.png)
- Feb 27, 2022
- 2 min read
So, things haven't quite gone the way I've planned....I've found myself in the middle of another artwork hiatus, with every good intention of returning, it being a matter only of "when". The answer in my mind is always, "soon", yet the months keep moving forward. But it's not what you might be thinking - it's not a creative crisis, it's just life (as many artists will repeatedly lament). Once the train gets off the tracks, it can be hard to get it back on.
Last summer, I decided that I wanted to enter the local Russian university, which meant that in order to pass the entrance exams taking place in a matter of just a few weeks, I had to learn the same knowledge that students have been studying over the course of years. I furiously read up on all the necessary topics, constantly tested myself online, and learned the basics of drawing (haha, for all my years as an artist, I never formally trained in drawing). These activities seriously threw me off my routine and at the same time left me stressed out and unable to concentrate on new work. Then, I passed all my exams and found myself a new student in the fashion and textile design program. Soon, it was time to arrange my travels to the US in order to obtain my new visa - and in the age of covid restrictions, this also was stressful and required a lot of preparation. But, I figured I'd only be gone a few weeks, and then can get back to my art practice. Ha! Life had other plans.
I was ultimately stuck in the US for 2 months. That's when I began making the sequined Christmas stockings I so adore (found on my Etsy shop). Anyway, by the time I returned in November, I was a little out of sorts, out of my routine, and needing to catch up on school work. I barely looked at the blank felted background I had so long ago prepared. No big deal - I'll get to it soon enough, I figured.
Now it's the end of February and the blank canvas mocks me still. What could possibly have created yet another delay? Well, slipping on ice and catching yourself with your right hand doesn't help you create artwork....especially by the third time it happens. Yes, this was an icier winter than most! It left me with a sprain that took months to heal. Partly it was my fault, as it was so hard to accept that my right hand was virtually useless. I couldn't accept the inactivity for a long time, and added extra strain to the original injury. For a person who lives by her hands, it's very hard to live without them. It was a "growth opportunity" for my psychology, to say the least.
Now things are finally improved, and I have hopes for beginning this artwork which has been in my mind for at least 6 months. I hope to be able to share it here before summer! Fingers crossed that life doesn't get in the way!

- Oct 14, 2021
- 1 min read

How many of us were lucky enough to grow up with a magical-seeming Christmas stocking? One which was waited for with eager anticipation, fawned over and loved?
My sister and I were reminiscing over our childhood stockings one day, and decided to look on the web to find something similar. We don't know what happened to our stockings - they got buried somewhere as our parents moved around - so we hoped to jog our memories by viewing vintage stockings. To our disappointment, we didn't find anything at all which recalled our fond memories.
That was the day that I decided to branch out into this exciting field, and put myself in the role of "grandma", making quality handmade, heirloom stockings, which can be kept for a lifetime and more. Just like when I was a child, I still delight in the abundance of glittering sequins and beads. I love the way the light plays and interacts with these objects, and I hope they become a treasured part of any family's traditions.


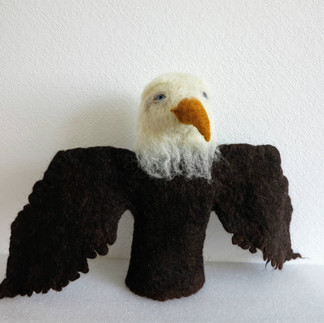
And there are puppets available in my shop, as well!


- Jun 11, 2021
- 2 min read

This work was underway for a little less than a month. I got to use my blended wool in the wet felting process for the first time. I was surprised how much was needed, and of course I didn't make enough in advance and had to blend it and lay it out at the same time, which prolonged the amount of time sitting on the floor - not my favorite position, especially when you consider that the whole process takes from 5-6 hours.
Here I have the dry wool laid out (left) and in the right photo the process is already fairly underway. The wool has fused into cloth but is not yet shrunken down.


Below is a view of the blended wool I have laid on top of the felted wool at the bottom of the piece, to evoke the varying colors of the dying sun on desert sand. I've begun to stitch the wool/viscose down with a variety of silk thread colors in a meandering line. Before stitching wool, I use a homemade, washable solution to make it into a solid mass, like fabric so that it's easier to work with.


In order below, we have the base color of the pyramids, to which I added highlights and shadows. Then I have a styrofoam board for making little figures from fibers. They also have a washable solution to harden them. After they're dried, I can securely stitch them on and wash out the solution in the end. I originally intended to needle felt the figures, but because they are so small, especially around the neck area, it was hard to get a defined enough shape, especially since the underlying wool is not felted and therefore fairly open and loose. Anyway, although not my favorite process, pre-shaping the figures was the best way to go.


Next, after doing all the math to scale the face from the sketch, I drew it onto paper and stitched through it. This outline became the guide for filling in with needle felted viscose and silk fibers. I don't have a lot of colors in these materials, so on it's own, it didn't quite fit the piece. Therefore, the next step was to add beads on top, which added an extra eye-catching feature and balanced out the colors so that the over all effect was more harmonious.


The process is nearly finished! After the head was completed, something was needed to connect the top and bottom of the work. In comes silk fiber! And presto - it's done!