.png)
- Dec 6, 2020
- 2 min read

This piece is a departure from my usual work. I only really feel comfortable with my work when I know that it is sturdy and nearly unbreakable - hence the reason I like quilts. You can throw them around, fold them up, be generally quite aggressive with them and they'll recover with just a few simple tricks. And not only do I like quilts, but well-stitched quilts, where all the elements are securely fastened, and if they are fragile elements, I really prefer putting them safely under silk organza, like putting a fragile specimen under a glass dome. I've never been comfortable with those few pieces which seem vulnerable to my typical style of working.
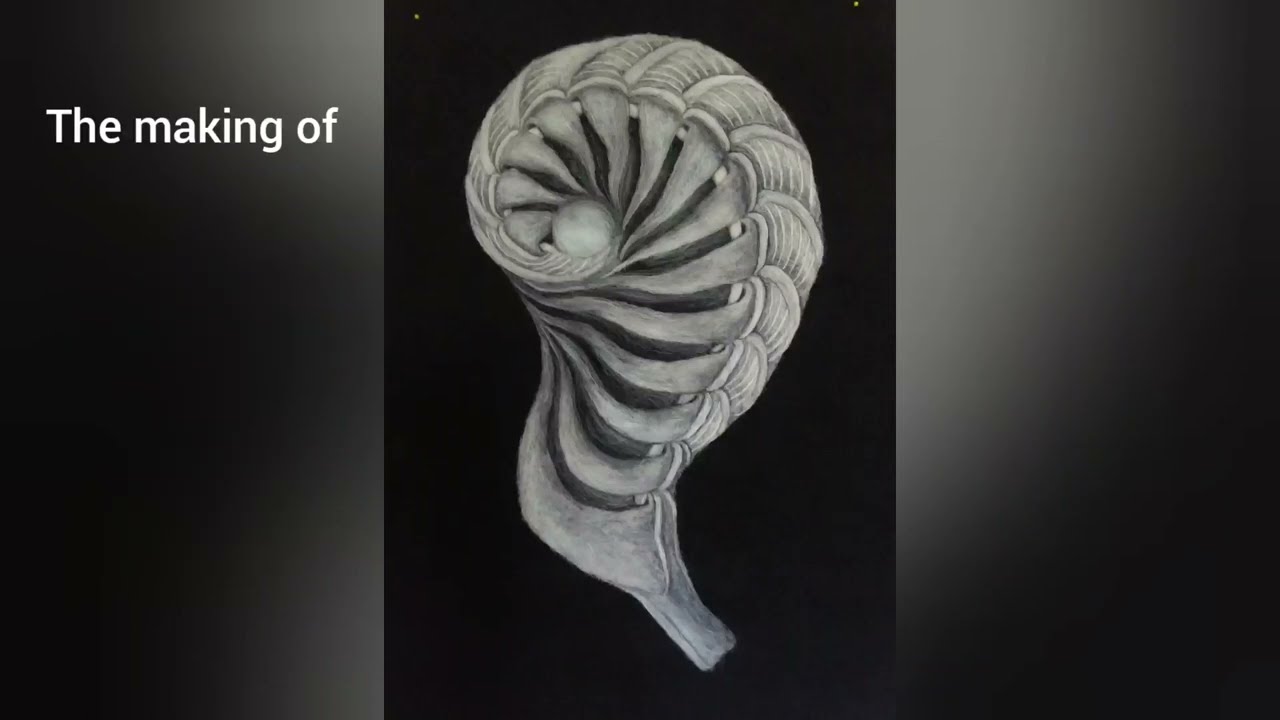
But then we have this piece, which, while not really fragile at all, gives the impression of fragility.
I actually don't remember making this piece very well, but I can puzzle the steps back together using the pictures and making educated guesses.
I began with a background of soluble fiber sheets which I stitched together. I then stitched a portion of the swooping lines. In this picture below, I've cut out my human forms and have them in the position I want them.

Next, I've added the wall which will go between them. This wall was created by stitching on thin silk organza with the aid of a soluble sheet so that it would be more manageable. Of course, at some point I cleaned up those loose threads. I detest loose threads in my work.

I don't have a picture in between these two steps, but basically I layered silk fibers over these elements, sandwiched it all with another layer of soluble fiber and stitched some more with black thread, and then stitched even more with transparent thread. Here you can see that I've already washed away the soluble sheets and am left with a web-like structure that was a bit of a mess at first. But, all fibers can be organized with pins! So I laid it out, stretched it where it needed to be stretched to maintain it's proportions, and pinned everything until it dried. I was a little nervous about getting the paper people wet, but mostly just because I wasn't used to dealing with more vulnerable materials.


This work is in a private collection, but other works from Parallel Worlds are available for purchase from Roberta and Bob Rogers Gallery.
- Dec 4, 2020
- 2 min read
Detail:

This piece includes multiple elements and unusual materials for me. I incorporated hemp fibers and paper, along with my usual assortment of materials, silk fabric, thread and fibers, and my trusty polyester thread. This combination of course and fine, dense and transparent really attracts me to this piece, and the silk fibers beneath the organza really do appear to be a glow from a lantern.
Below is the sketch which represents this piece's humble beginnings! As you can see, most of the detail is still in my head, with the sketch mostly serving as a reminder of where things should be. Most details get worked out in the process of making.

In the image below, I have laid out the essential parts: There are silk fibers in gradient shades on the left side of the piece to give the impression of strong to fading light. In the middle I have embroidered the staff in the man's hand, cut out the man from paper, and cut out the sheet of hemp fibers I had made in advance. When needing hard, straight lines, I first laid out fibers and saturated them with sizing (a stiffener) and let them dry. Then you can treat it as you would paper. On the bottom right, I laid out fibers for a shadow. At some point, I enhanced the staff's light with metallic threads in a free-form manner.


Here we see everything stitched underneath a hand-dyed piece of grey silk organza. It softens everything and really finishes off the piece, making it seem as if there is a person trapped within the crystal.

All that's left is to enhance some features with hand embroidery. The lines got finished off so that the "front" of the crystal stands out, and the light got some brighter color. Finally, the edges were trimmed, folded back and machine and hand stitched.


All in all, it turned out quite well, I think.

This piece is in a private collection, but other works from Parallel Worlds are available from Roberta and Bob Rogers Gallery.
- Dec 1, 2020
- 3 min read
When I became more serious about dying fibers and fabric, I wanted to purchase a dedicated device to heat my water. I researched several options of hotplates and sous vide. The sous vide intrigued me, I couldn't see any disadvantages to it, and it was priced about the same as a quality hotplate.
I don't remember the brand, but it cost around $60 on Amazon. My fiber art friend now has it and she also really loves it. I want to describe the advantages and how to use it for dying fibers.
Advantages:
It heats your water evenly by circulating it so you don't have to worry so much about constant stirring. A hotplate will heat the water at the bottom of the pot much hotter than the water at the top. Therefore, the fabric at the bottom will pick up more dye than what's nearer the surface. To avoid this, you must stir the pot frequently. With the sous vide, you still have to stir, but the heating element is in the middle of the pot and it has a mechanism which is always moving the water around. This leads to very even temperatures throughout the pot.
Another thing is that you can set the temperature you want, unlike with a hot plate. When dying different materials, you may want a higher or lower temperature. You never want boiling water, which a hot plate might lead to if you're not careful. On the display you can set and monitor the temperature, and even through reviews say that it isn't always 100% accurate, for dying purposes, 1 or 2 degrees difference is not a big deal. Also, because of how the sous vide heats water, described above, it's better for fibers like wool, which like to gradually change temperatures. If it's shocked by becoming too hot too fast, it may felt on you.
There is also a timer, which is quite convenient.

There are some aspects of the sous vide which are not ideal for loose fibers especially. There is an opening on the tube which is where water is circulated. Inside there's a little propeller type device. This circulation of water around this propeller will take your fibers with it and they can get tangled inside. I didn't have dramatic problems with this, but I still looked for different solutions. One was to keep fibers separated in little bags, and regularly dip them so that they would receive fresh water and dye. This had the added advantage of keeping fibers in an orderly arrangement. When they are immersed in water they like to spread out really wide and get tangled a little with each other. I didn't have any problem with this method, but you do have to make sure to renew the water in the bags frequently. It makes it convenient to share the dye pot with other fibers and fabric as well. You don't want to be stirring fabric and tangle fibers up in the fabric.
The other thing which worked for me, if I wanted the fibers to be loose for stronger dye saturation, was to cut off the foot part of some old panty hose and using a string, tie it on around the sous vide tube. This allows water through but blocks the fibers from getting inside. This worked totally fine. I would recommend this method at all times just to be on the safe side and keep your sous vide clean and in good condition.

These are some results of one dye pot. Different fibers took up the dye differently.
Warning: If using a sous vide for dying, DO NOT use it for food preparation. As with all dying equipment, it should be dedicated only to dying because it can be toxic to use for food preparation.